Creating a visual map between code and its parse tree
This article presents a technique for exploring parse trees visually in the browser. The first part of the article provides context and demonstrates the basic idea. The second part delves into implementation details and provides javascript demonstrations of the lexer, parser and renderer.
Background
Recently I have been doing some work on a transpiler project that deals with parsing C code. Before I got too far into that, I soon realized that I needed to brush up on my C grammar skills. So, I cracked open my copy of K&R and started to pore over the grammar section.
A small snippet of the grammar rules are shown below:
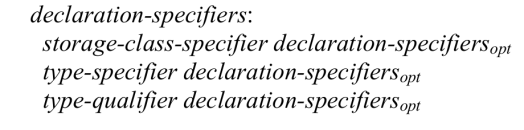
These rules will tell you how to build a parser that can recognize C code, but they don't really do a lot to enlighten you as to how these rules map into source code.
So, as I read through them, I started to doodle on a piece of paper, writing out small fragments of code and then circling and annotating them, like so:

Being the virtuous lazy programmer that I am, I soon tired of this endeavour and decided to build something to do this for me. Well, not that exactly, but a visual tool that would let me visually explore the mapping between a chunk of source code and the parse tree derived from it.
I started to sketch out a rough design that would consist of a code pane on the left and a tree layout on the right: (warning: programmer art)

Mainly I wanted to be able to:
- Select bits of code on the left and examine the parse tree on the right
- Select nodes on the right and see the relevant bits of code highlighted on the left
As I started to nut this out, I realised I had most of the pieces sitting in front of me in the browser! It already comes with tooling for inspecting the DOM, and it will even highlight matching parts of the document : the dev tools!
I figured that if I could parse the source code and emit the right kind of HTML, I could get my visual source code mapping tool for free. So, I quickly whipped up a prototype using yacc and lex that parsed C89 code and generated HTML.
The results from that initial prototype are shown below, using a fragment of code from an emulator project I am working on:
typedef unsigned int uint32_t;

static int op_beq(struct MipsEmu *emu, uint32_t rs, uint32_t rt,
                   uint32_t broff)
{
    if (emu->regs[rt] == emu->regs[rs]) {
        emu->delay_pc = broff;
    } else {
        emu->delay_pc = emu->pc + 8;
    }

    emu->next_is_delay = 1;
    return 0;
}
If you inspect the C code in the div above using the dev tools, the structure of its parse tree becomes apparent. The rules used to parse a particular piece of code are turned into class labels such as additive-expression-1, and it becomes easy to ascend and descend the tree and match parse tree nodes to chunks of code as they get highlighted.
The intended effect is displayed in the screenshot below:

In the above figure, a parse tree node marked with the class additive-expression-1 has been selected in the dev tools, which makes the browser highlight the matching fragment of code emu->pc + 8 in the document.
Below is a snippet of the yacc grammar involved with that particular rule highlighted (additive expression rules, offset 1):
additive_expression
    : multiplicative_expression
    | additive_expression '+' multiplicative_expression
    | additive_expression '-' multiplicative_expression
    ;
After I was happy with the prototype, I ported it to javascript so that I could easily share and demonstrate the technique. The implementation details are covered in the next section.
Implementation
The bulk of the work is done by the the parser and lexer. These are written using jison and are derived from Jeff Lee's C89 grammar originally published to usenet.
Jeff Lee's grammar is available here:
High level overview
The overall flow of data in the program is as follows:
lexer -> parser -> renderer -> browser
The lexer uses regular expressions to recognize tokens in the input and hands them off to the parser.
The parser recognizes groups of tokens as specified in the grammar and then executes the actions specified for each rule. These actions build up a syntax tree.
The syntax tree is picked up by the renderer, which makes a few adjustments to handle comments and whitespace. It then recurses down through the tree, emitting HTML as appropriate for each node.
Finally, the browser renders the HTML along with any CSS for syntax highlighting, and the parse tree (represented by DOM nodes) can then be inspected using the dev tools.
The jison grammar for both the lexer and parser is published here:
The source code for the lexer, parser and renderer will be published on github shortly, and in the meantime can be obtained by inspecting the source code of the demos, which are in the next section.
Lexer Demo
The input pane is for inputting standard ANSI C89 source code (with no preprocessor directives).
If you click 'lex', the lexer will lex the source code in the first pane and display the tokens recognized in the second pane.
Parser Demo
The first pane is for inputting C89 source code.
If you click 'parse', the parser will parse the source code in the first pane and display the syntax tree in the second pane.
Renderer Demo
The first pane is for inputting C89 source code.
If you click 'render', the renderer will render the syntax tree as syntactically marked up HTML in the second pane.
As discussed in the background section, inspecting the elements in the second pane with the dev tools will allow you to visually explore the parse tree.
Hovering over parse tree nodes (which are now represented by span elements) in the dev tools will make the browser highlight the matching source code fragment.
Taking advantage of the syntactical markup, some basic syntax highlighting has been added (colours nicked from gvim) using CSS, a snippet of which is shown below:
.if, .else, .switch, .for, .return {
  color: #a52a2a;
  font-weight: bold;
}

.storage-class-specifier, .type-qualifier {
  color: #2e8b57;
  font-weight: bold;
}
The End
That concludes the presentation. Thanks for reading and trying out the demos!
Like the article? Please follow me on twitter and check out my bio.